
There are some crafts that stand the test of time. Friendship bracelets have been rocking the world of pre-teens for well over 30 years. Every mom in the country has a recipe for homemade play dough tucked away that was likely passed down from their own mom. At some point in your life, I guarantee you have ironed crayon shavings between waxed paper. These are activities that work because they are simple, fun, and produce quality results.
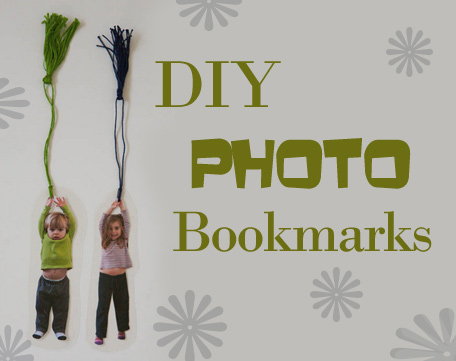
Photo bookmarks are one of those time tested craft projects. Everyone loves them, they are simple to make, and they hold up well for a long time.
Materials
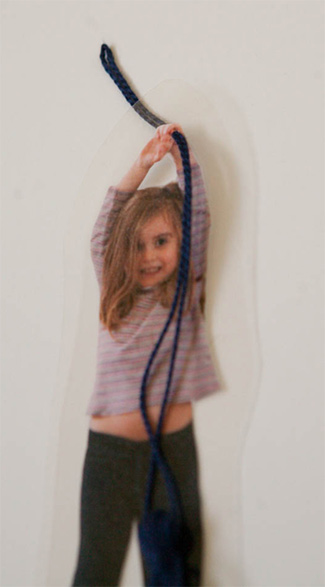
- Photo of your kid with their arms up
- Laminator/plastic sheet or access to print shop
- Scissors
- Hole Punch
- Embroidery floss
- Cardboard or cardstock about 3 inches long/tall
How To
Make Photo Portion
1. Take a photo of your child with their arms up. Belly exposure is a bonus.
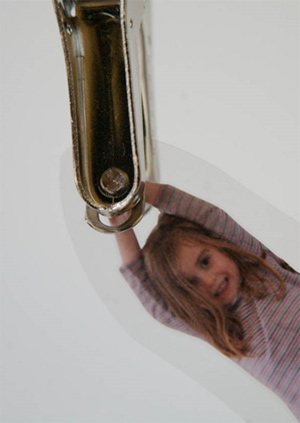
2. Print the picture so that it is about 5 inches tall and cut it out.
3. Laminate photo. Any print shop will be able to do this for you if you don’t have a laminator.
4. Cut out around the photo again, but leave about 1/4 laminated border so it stays sealed.
5. Using a hole punch, put a hole in the area of the picture near their hands.
Make Tassel
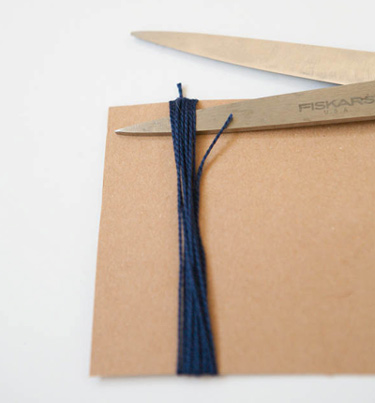
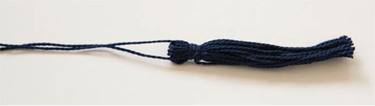
1. Line end of embroidery floss up with the end of the cardboard.
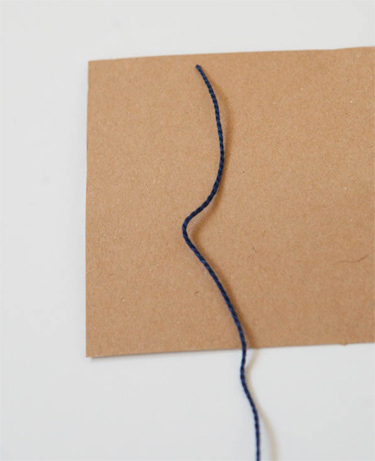
2. Wrap floss around cardboard about 12 times and cut end. The more you wrap, the thicker your tassel will be. Make sure you cut the floss on the same side of the cardboard you started the wrapping.
3. Slide scissors between floss and cardboard and cut all the floss. Again, make sure you do this on the side with the cut ends.
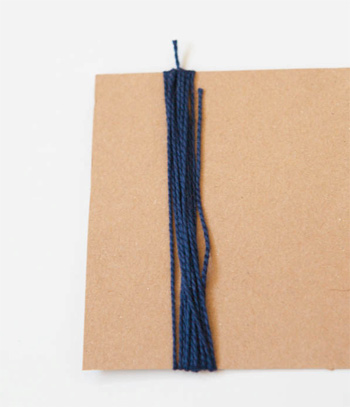
4. Cut a piece of floss about 10-12 inches long and tie the ends in a knot.
5. Slip that loop over the 12 strand tassel, making sure the knot is hidden in the folded floss.
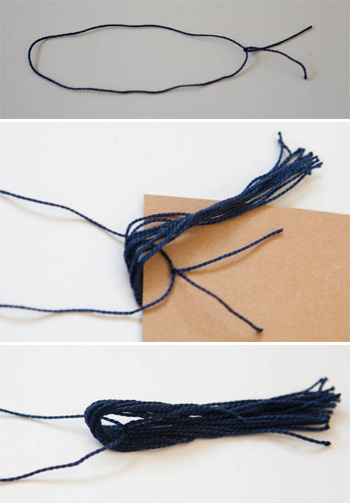
6. Cut a piece of floss about 7-8 inches long and slide it under the tassel floss.
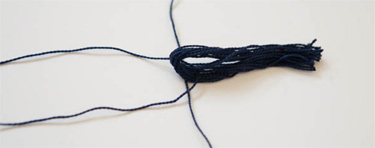
7. Knot the newest piece of floss around the tassel floss, making sure that the loop knot is on the open end of the tassel from your new knot.
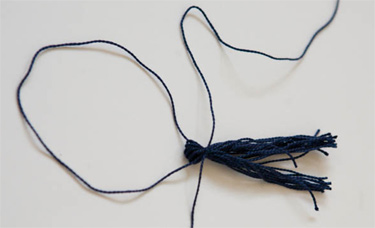
8. Wrap the tail of the newest floss around the tassel 5-6 times and knot it off.
9. Trim the end of the tassel so that all pieces are the same length.
Make Final Bookmark
1. Insert tassel into hole on bookmark from the front side.
2. Put the tassel through the loop and pull tight. Now go find a good book and put this bookmark to good use!
