
Did you know you can make a gorgeous flower cupcake without any special cake decorating supplies? All you need is a Ziploc bag and you can come up with something fun, creative, and delicious!

I have included instructions on how to make a Whimsical Flower Cupcake, but you can use this technique to make any design you can imagine; the possibilities are endless!
How To Make A Ziploc Piping Bag:
- You can use any sandwich bag for this but I prefer the quart size freezer bags since they are more durable and not as likely to burst open.
- Place some frosting into the bag. *Tip* To fill your bag without a mess: Place the bag into a tall glass or cup, fold the top of the bag down around the edges of the cup, spoon in some frosting.
- Squeeze the frosting down into one corner of the bag. Twist the bag to close and secure it with a rubber band.
- Cut a VERY SMALL piece off the tip of the bag. The less you cut, the finer your tip will be. If you cut off too much, more frosting will come out and chances are it will make a big mess. Its better to cut a little bit at a time until you get the size you are looking for.
- Squeeze the frosting down to remove any air bubbles out of the bag.
- Twist the top of your bag and secure it with a rubber band to keep your frosting from spilling out the top.
- When you pipe, squeeze from the top so the frosting squeezes down through the tip and doesn’t gush up out of the top of the bag.
- You are ready to get piping!
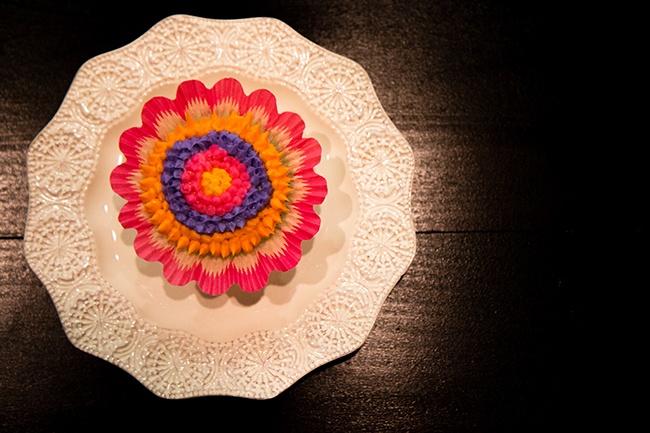
Whimsical Flower Cupcake Directions:
- Fill several Ziploc piping bags with different colored frosting.
- Hold the piping bag at a 45 degree angle with the tip of the piping bag slightly above the surface of the cupcake. Start from the outside edge of the cupcake. Give the bag a gentle squeeze and quickly pull up. Repeat this making a pattern around the edge of the cupcake.
- I made two rows of each color. As I made my way inward, I began to start holding the piping bag at more of a 90 degree angle.
- It’s as simple as that!
About the author: Rubina Umarji is the owner and executive cake artist of Rubina’s Cake Shoppe. After the birth of her son in 2009, she left her career in engineering to focus on her two passions: her family and her edible art. Since then, she’s had the opportunity to showcase cakes and gourmet confections to thousands of dessert loving clients as well as over 100 of Hollywood’s hottest stars and has had her cakes featured on television. Now her days are focused on teaching cake decorating classes to all ages. Her favorite students are her two children, ages 3 and 5. She frequently writes cake decorating tutorials and recipes on the Rubina’s Cake Shoppe Blog (www.rubinascakeshoppe.com/blog).