
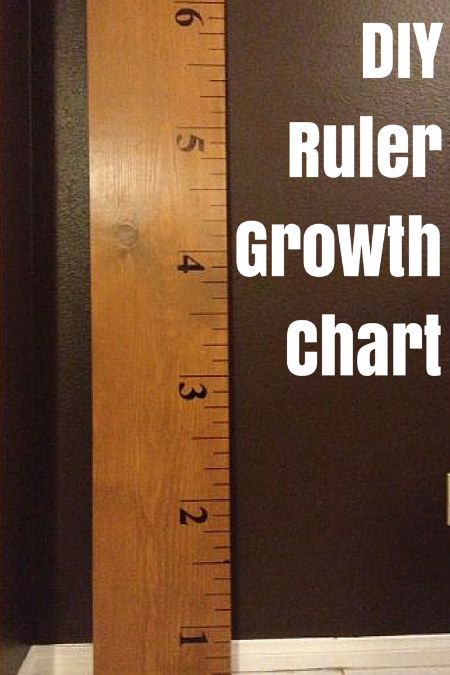
I can barely believe it, but my baby boy is turning 4 next week! He is growing so fast, I don’t know what to do with myself. I’ve been meaning to get a growth chart for a while now, but all the ones I really like are way out of my budget.

Nothing sparks a crafty fire like a lack of funds. I scraped together some supplies, got organized during nap time, and cranked this baby out for next to nothing! It turned out pretty darn cute if I do say so myself.
Supplies:
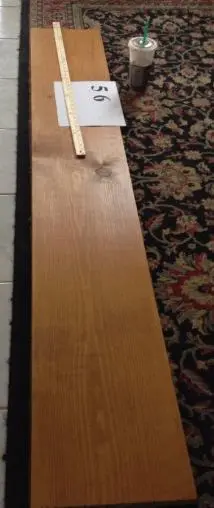
Wood Plank (6′ x 1.5′)
Minwax Water-Based Express Color Wiping Stain and Finish
Minwax Poly Water-Based Semi-Gloss Spray
Sharpie Fine Point Marker
Pen or Pencil for marking
Clothe or brush for staining
Sandpaper
Ruler or T-square
Printed version of numbers
Growth Chart Instructions:
1. Sand the surface and sides of your wood plank, then brush off any extra dust.
2. Stain the surface according to label instructions. This was pretty simple. Basically, just wiping the stain on and waiting for it to dry. I chose to do two coats, but this is up to your discretion.

3. Once the stain is dry, begin making guide marks with your pen or pencil. Make sure to make one mark at every inch if you want to use this as a true growth chart for your children. Also, don’t start the bottom at zero. You will presumably mount this ruler on the wall, so remember that first inch will actually be several inches from the floor. To make the growth chart accurate, I decided to start the bottom of the ruler at 6 inches.

4. Take your T-square and begin making black lines with your Sharpie. (I originally used a paint pen. Do NOT make that mistake. A Sharpie is much easier and cleaner, but the paint pen bleeds.) I chose to vary the sizes of my lines to make it look more like a ruler. The shortest lines were 1″, then the larger lines were 2″, 3″, or 4″. This variety of sizes seems to provide changes similar to the marks on a traditional ruler.
5. Once all your lines are in place, you can add the numbers. I printed out my numbers using Times New Roman font in Bold. I really like the way they turned out! This is a matter of taste, though, so play around with the font and size of your choice.
6. Cut out the printed numbers and trace them in the proper positions on your growth chart.
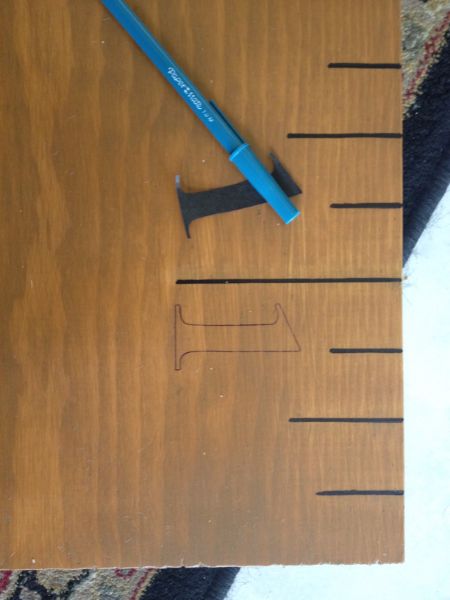

7. Fill in the traced numbers using your permanent marker. (Again, I tried painting them in with traditional paint, and it didn’t look as good as with a standard Sharpie.)
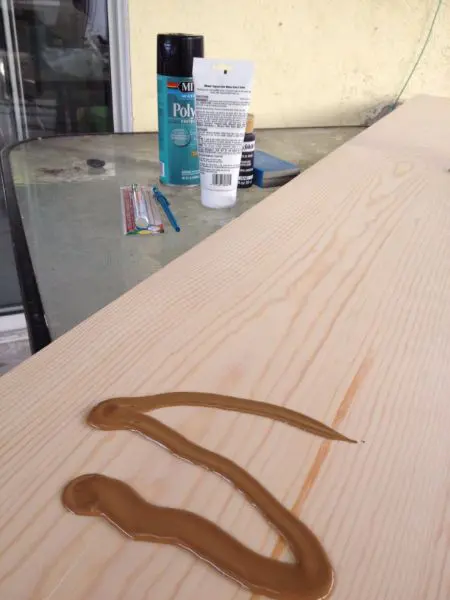
8. Once the numbers are all filled in and dry, spray the entire ruler with your water-based poly spray. This will seal the stain and permanent marker and provide protection for the wood.

And that’s it!
Once the poly dries, you’re done! Decide where you want to mount it and enjoy.