
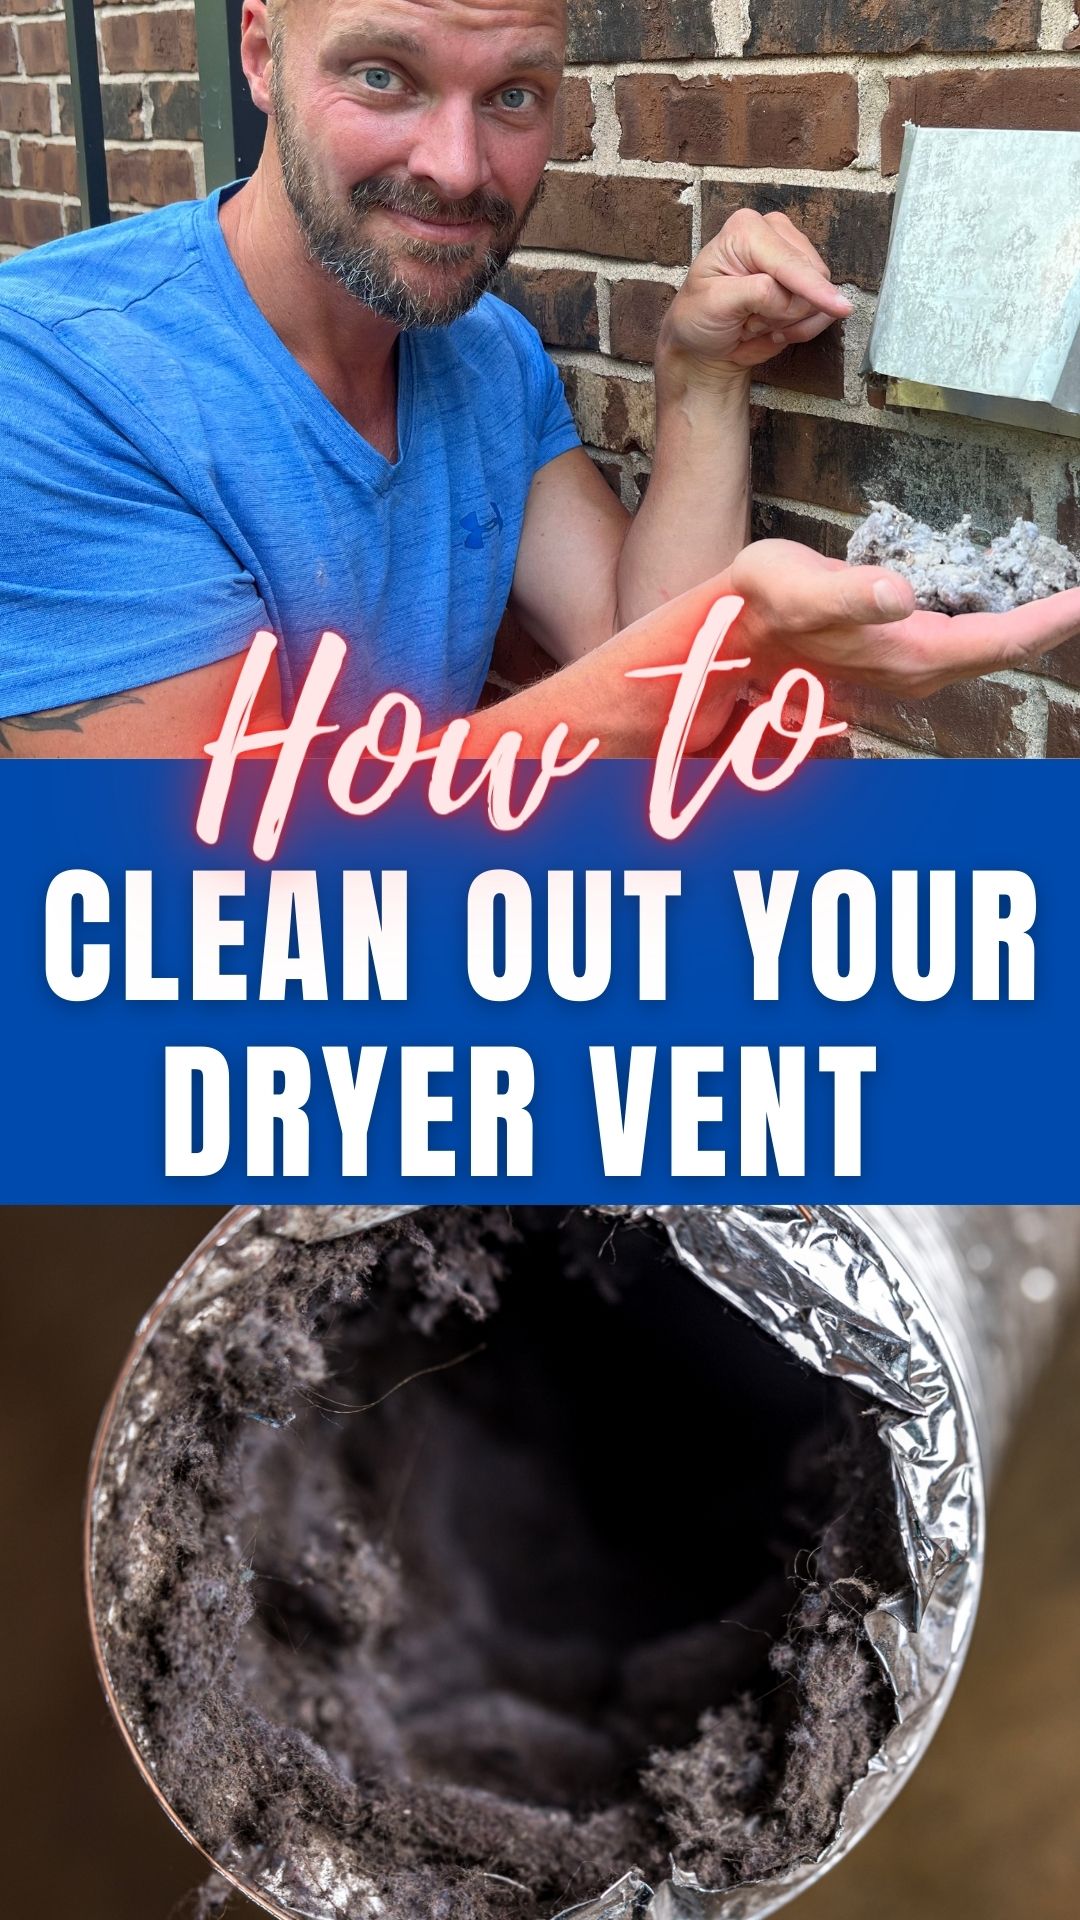
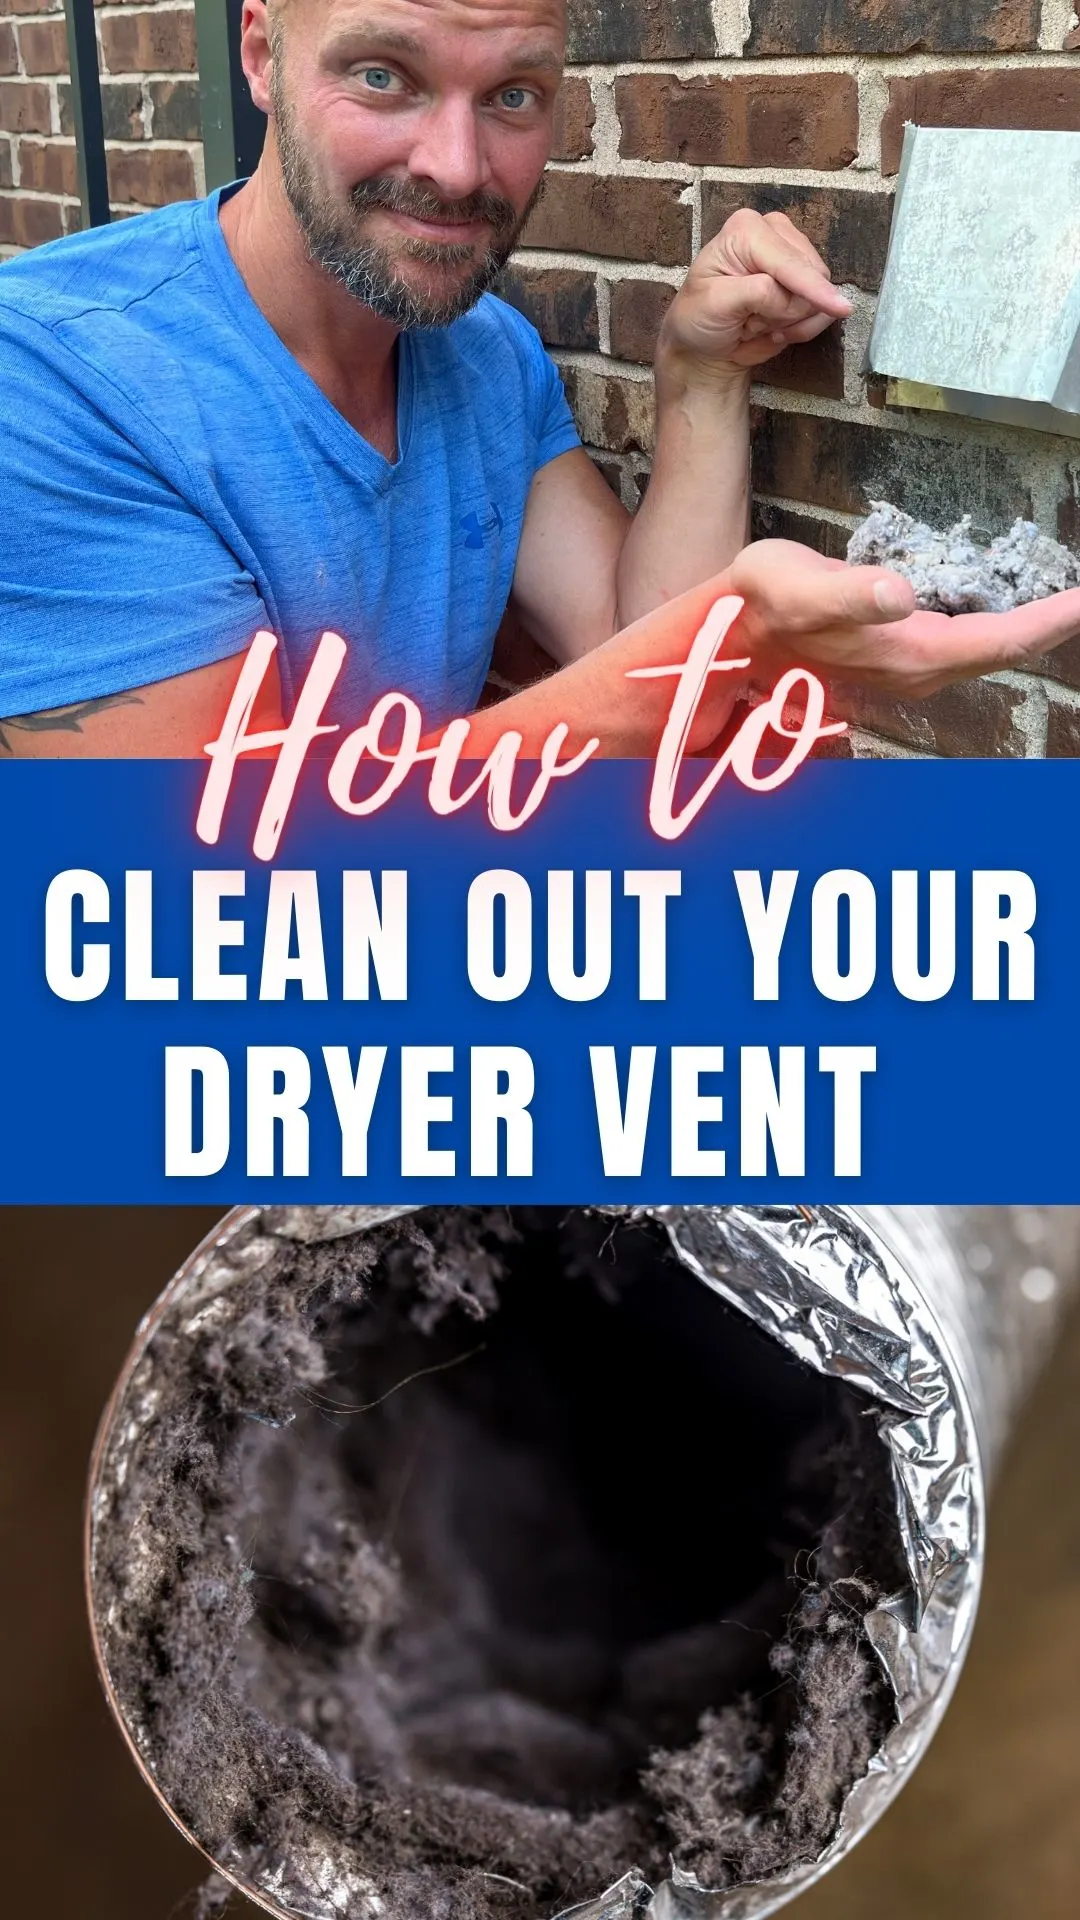
Maintaining your dryer and its venting system (aka the “dryer vent”) is essential for both safety and efficiency. Over time, lint and debris can accumulate in the dryer vent, causing it to become clogged. This not only reduces the dryer’s performance but also poses a fire hazard. Cleaning the dryer vent on the outside of your home is a simple yet crucial task that should be a part of your regular home maintenance routine. In this guide, we will walk you through the steps to clean out the vent to your dryer on the exterior of your home.
DRYER VENT CLEANING VIDEO
Why Cleaning Your Dryer Vent Matters
Before we dive into the cleaning process, it’s important to understand why cleaning your dryer vent is so important.
- Fire Safety: A clogged dryer vent is a significant fire hazard. Lint is highly flammable, and if it accumulates in the vent, it can easily ignite, leading to a devastating house fire.
- Improved Efficiency: A clean dryer vent allows hot air to escape more efficiently, reducing drying times. This not only saves you energy but also extends the lifespan of your dryer.
- Lower Energy Bills: When your dryer has to work harder due to a clogged vent, it consumes more energy, resulting in higher utility bills.
- Prevents Mold and Mildew: Moisture can accumulate in a clogged vent, providing an ideal environment for mold and mildew growth.
Step-by-Step Guide to Cleaning Your Dryer Vent
- Safety First: Put on your work gloves and safety goggles to protect your hands and eyes from dust, debris, and potential critters that may have taken up residence in the vent.
- Disconnect the Dryer: Unplug your dryer from the electrical outlet and turn off the gas supply if your dryer uses gas. Safety should always be a priority when working with appliances.
- Access the Exterior Vent: Go outside your home to locate the dryer vent. It’s usually located on an exterior wall near the ground or at waist height. Use a screwdriver to remove any screws or fasteners securing the vent cover.
- Clean the Exterior Vent: With the vent cover removed, you can now access the exterior of the vent. Use a vent brush or lint brush to clean out any lint and debris from this end. Be thorough in your cleaning, ensuring you remove all visible obstructions.
- Clean the Interior Vent: Go back inside and connect the long hose attachment to your vacuum cleaner. Insert it into the vent from the interior side to suck up any remaining lint and debris. Be sure to reach as far as possible, but avoid forcing it if you encounter resistance.
- Reassemble and Test: Reattach the vent cover and secure it in place with screws or fasteners. Plug in your dryer and turn on the gas supply if applicable. Run your dryer for a few minutes to ensure that air is flowing freely through the vent.
- Regular Maintenance: To prevent future clogs, clean your dryer vent at least once a year or more frequently if you notice longer drying times. Regularly check the lint filter and clean it after every use.
Cleaning out a dryer vent on the outside of your home is a relatively simple task that can have a significant impact on your home’s safety and energy efficiency. By following these steps and making dryer vent maintenance a part of your regular routine, you can ensure that your dryer operates efficiently and safely for years to come.
Looking for a new dryer? Check out our review of the Samsung Dryer or our review of the Samsung Washer & Dryer Set.
Margaret
Saturday 14th of September 2024
I bought a vent brush and attached it to my drill. Working from the outside, I started cleaning. But when I pulled my drill back to remove the brush, the last section of extension with the brut was missing. It is in the wall. I cannot reach it. Any ideas?